 English
 中文简体
中文简体
Jun 17,2026
Content
Vinyl sheet pilings have become a popular alternative to steel and timber for seawalls, bulkheads, and retaining structures because they resist corrosion, require minimal long-term maintenance, and install relatively quickly once the process is properly understood. However, vinyl piling installation is not simply a matter of pounding panels into the ground. Getting interlocking joints aligned, controlling panel deflection during driving, and managing soil conditions correctly all determine whether the finished wall performs as designed for decades or develops gaps, leans, or leaks within the first few years.
Planning and Site Preparation Before Installation
Every successful vinyl sheet piling installation begins well before the first panel touches the ground. Skipping preparation steps is one of the most common reasons walls end up misaligned or structurally inadequate.
Soil Assessment and Engineering Review
Before ordering materials, the soil composition and water table at the installation site need to be evaluated, since vinyl piling depth and embedment requirements depend heavily on whether the ground is sandy, clay-based, or contains significant organic material. A geotechnical assessment or, at minimum, a review by a qualified engineer helps determine the required embedment depth, whether tie-back anchoring is necessary, and what wall height is structurally appropriate for the specific soil and water pressure conditions at that location. Skipping this step and relying on generic depth assumptions is one of the leading causes of wall failure after installation.
Selecting the Right Vinyl Sheet Piling Profile
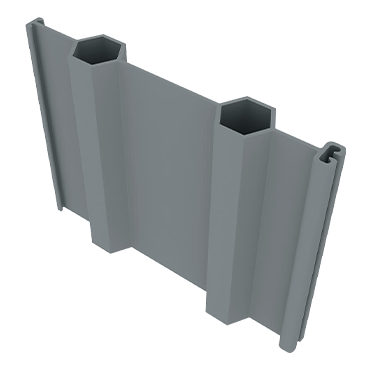
Vinyl sheet pilings come in different profile depths and wall thicknesses, each rated for a specific range of retained height and soil pressure. Choosing a profile that is undersized for the application can lead to bowing or cracking under load, while oversizing adds unnecessary cost. Manufacturers typically publish section modulus and moment of inertia values for each profile, which the engineering review should reference directly against the calculated load requirements for the project rather than relying on a profile used successfully on a different site with different soil conditions.
Equipment and Tools Needed for Installation
Having the correct equipment on site before installation begins prevents costly delays and reduces the risk of panel damage during driving.
- A vibratory hammer or impact driver sized appropriately for vinyl panel installation, since equipment designed for steel sheet piling often applies too much force for vinyl material.
- Guide walers, typically constructed from steel or treated timber, positioned on both sides of the panel line to maintain alignment during driving.
- A driving cap or drive head specifically designed to distribute force evenly across the top of the vinyl panel without cracking the material.
- A laser level or transit to confirm panel plumb and alignment continuously throughout the driving process, not just at the start.
- Excavation equipment if the project requires removing existing material or cutting a trench prior to panel placement.
Step-by-Step Installation Process
Once site preparation and equipment staging are complete, the actual panel installation follows a fairly consistent sequence regardless of project size.
Setting Up Guide Walers and Alignment
Guide walers should be installed along the planned wall line on both the front and back faces, spaced to match the panel width and securely staked or braced so they do not shift under the lateral force applied during driving. This guide system is what keeps the entire wall straight, since vinyl panels are flexible enough that without rigid guides, even small misalignments early in the process compound into significant deviation by the time dozens of panels are installed.
Driving the First Panel
The first panel sets the baseline for the entire wall, so it must be checked for plumb in both directions before driving begins and rechecked frequently as it is driven to depth. Many installers drive the first panel only partway, confirm alignment, then continue in stages rather than driving it fully in one continuous pass, since correcting a misaligned panel becomes increasingly difficult once it has been driven to significant depth.
Interlocking Subsequent Panels
Each subsequent panel slides into the interlocking joint of the previously installed panel before driving begins. The interlock should engage smoothly without forcing; if a panel resists sliding into place, this usually indicates the previous panel has drifted out of plumb and needs to be checked rather than forcing the new panel and risking joint damage. Panels should be driven incrementally, alternating slightly between adjacent panels in some methods, to keep the overall wall line consistent rather than driving one panel completely before starting the next.
Choosing Between Vibratory and Impact Driving Methods
The driving method selected affects both installation speed and the risk of panel damage, and the right choice often depends on soil density at the site.
| Driving Method | Best Suited Soil Type | Risk Level to Panel |
| Vibratory Hammer | Sand, loose to medium soils | Low, gentler on vinyl material |
| Impact Driving | Dense or compacted soils | Higher, requires controlled force |
| Hand or Hydraulic Pressing | Soft soils, shallow embedment | Very low, slower process |
Vibratory driving is generally preferred for vinyl sheet piling because the oscillating motion reduces friction with surrounding soil and applies more even, lower-impact force across the panel compared to repeated hammer strikes. Impact driving can still be used in denser soils, but installers should monitor panel condition closely, since excessive impact force concentrated at the drive cap can crack or deform the top of the panel before it reaches full depth.
Handling Corners, Curves, and Transitions
Most vinyl sheet piling projects are not perfectly straight runs, and corners or curves require additional planning to maintain wall integrity. Manufacturers typically supply pre-formed corner panels at fixed angles, commonly 90 degrees, which should be ordered in advance based on the actual site layout rather than improvised by forcing standard panels into an angled position. For gradual curves, slight angular deflection is possible at each joint within the manufacturer's specified tolerance, but exceeding that tolerance stresses the interlock and increases the risk of joint separation over time. Where curves are tighter than standard panel deflection allows, transition panels or mitered sections designed specifically for the radius should be used instead of attempting to force standard panels beyond their rated bend limit.
Common Installation Mistakes to Avoid
Several recurring errors account for the majority of vinyl sheet piling problems reported after installation, and most are avoidable with attention during the driving process.
- Driving panels without checking plumb frequently enough, allowing small deviations to accumulate into significant misalignment by the end of the run.
- Using equipment with excessive impact force, which can crack panel tops or distort the interlocking joint before full embedment depth is reached.
- Forcing panels into obstructions such as buried rocks or debris without first clearing the path, which often causes panels to deflect off-line underground where the problem is not visible until much later.
- Failing to install tie-back anchors or deadman supports where the engineering design calls for them, leaving the wall under-supported against lateral soil pressure.
Post-Installation Checks and Capping
Once all panels are driven to depth, the top of the wall should be checked for consistent height and alignment along its entire length before installing the cap. Capping not only finishes the wall aesthetically but also helps distribute load along the top edge and protects the panel tops from UV exposure and impact damage. Any panels found to be out of alignment at this stage should be addressed before capping, since the cap will lock the final position of each panel in place, making later adjustments far more difficult once the wall is considered complete.


